How to reduce keyboard noise in Discord.
Updated: 23 Jan, 2020Introduction
There is a good chance if you play games online, you’ve heard about Discord. With over 130 million users, the 5-year-old, easy to use voice chat service has taken the gaming world by storm. No matter what game you play, from Call of Duty to World of Warcraft, you have probably come across Discord.
Today, in the age of the mechanical keyboard, keeping your comms clear and noise free while furiously spamming hotkeys is harder than ever. The last thing you or your friends want during a gaming session is someone drowning out the voice chat with their mechanical keyboard.
But fear not, in this guide, we’ll cover tips and techniques that will help you reduce unwanted keyboard noises, to help keep you and your friends happy and sane while gaming.
Buy a "silent" mechanical keyboard
The defining feature of a mechanical keyboard is the switches underneath each key.
Compared to most mainstream keyboards that use a plastic membrane, these switches give mechanical keyboards a unique tactical feedback while typing. While they may feel great to type with, the trade-off is extra noise.
If you are looking to make the switch to a mechanical keyboard and want to be noise conscious consider
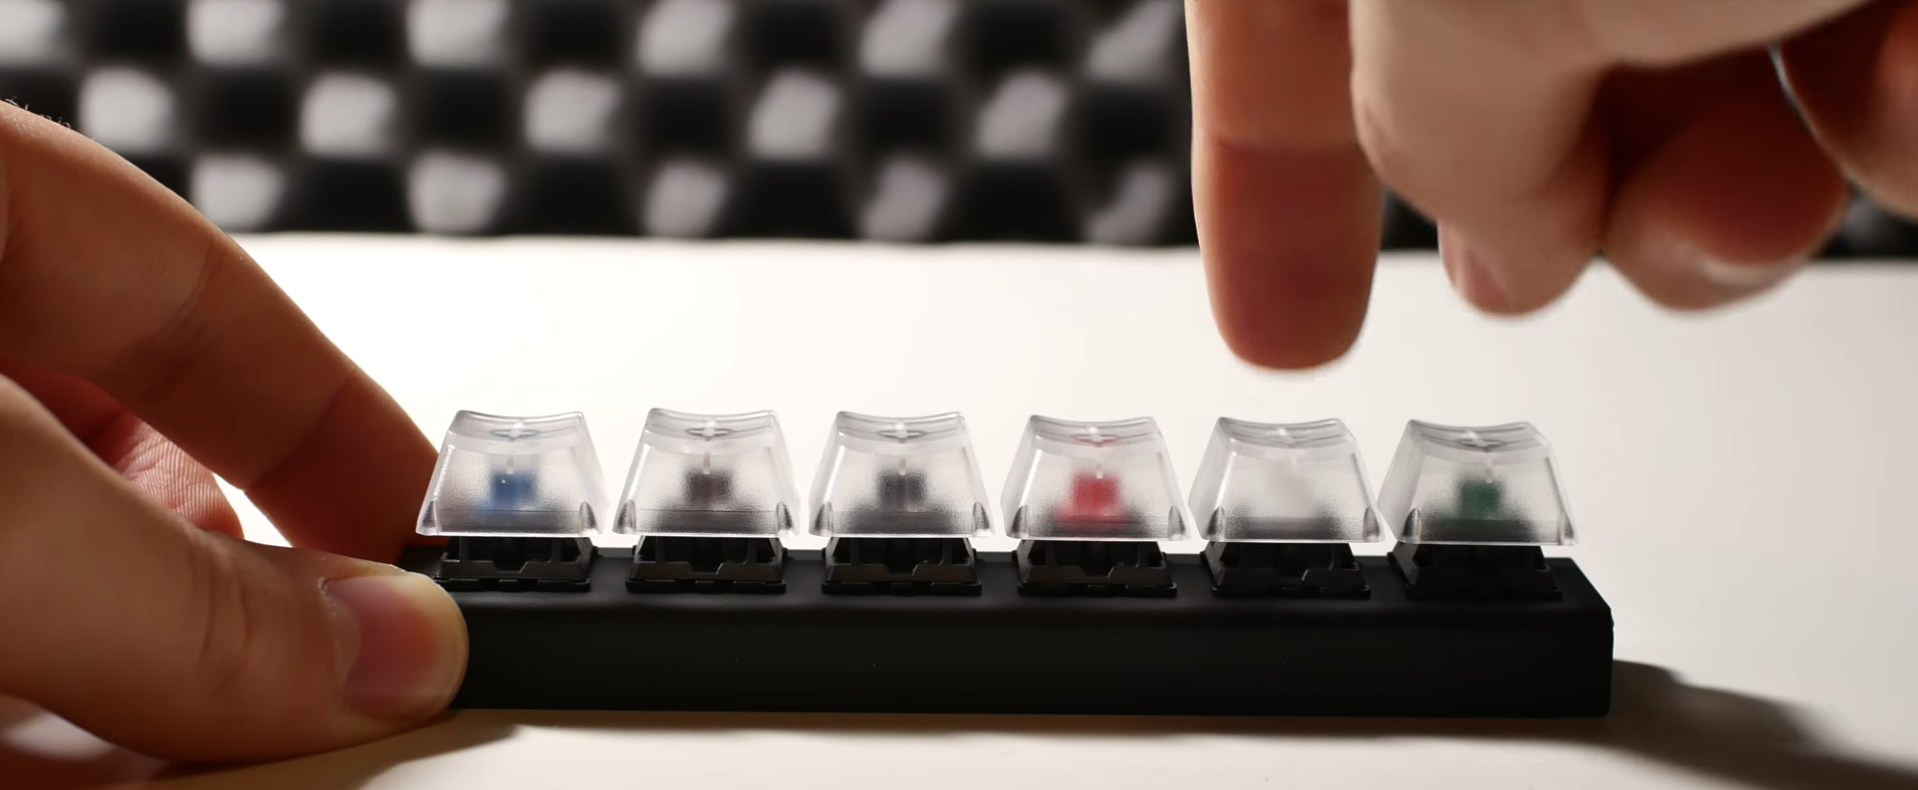
purchasing one with a quieter switch type. Typically “Red”, “Black” or “Brown” switches
are the quietest while “Blue” and “Green” switches are loud.
While a quieter switch
won’t eliminate all of the noise, the reduction can help.
If you are interested in hearing the different switches for yourself, check out this short sound comparison video.
“Silence” your mechanical keyboard
If you’ve already invested in an expensive mechanical keyboard and don’t want to part ways, consider this little bit of DIY.
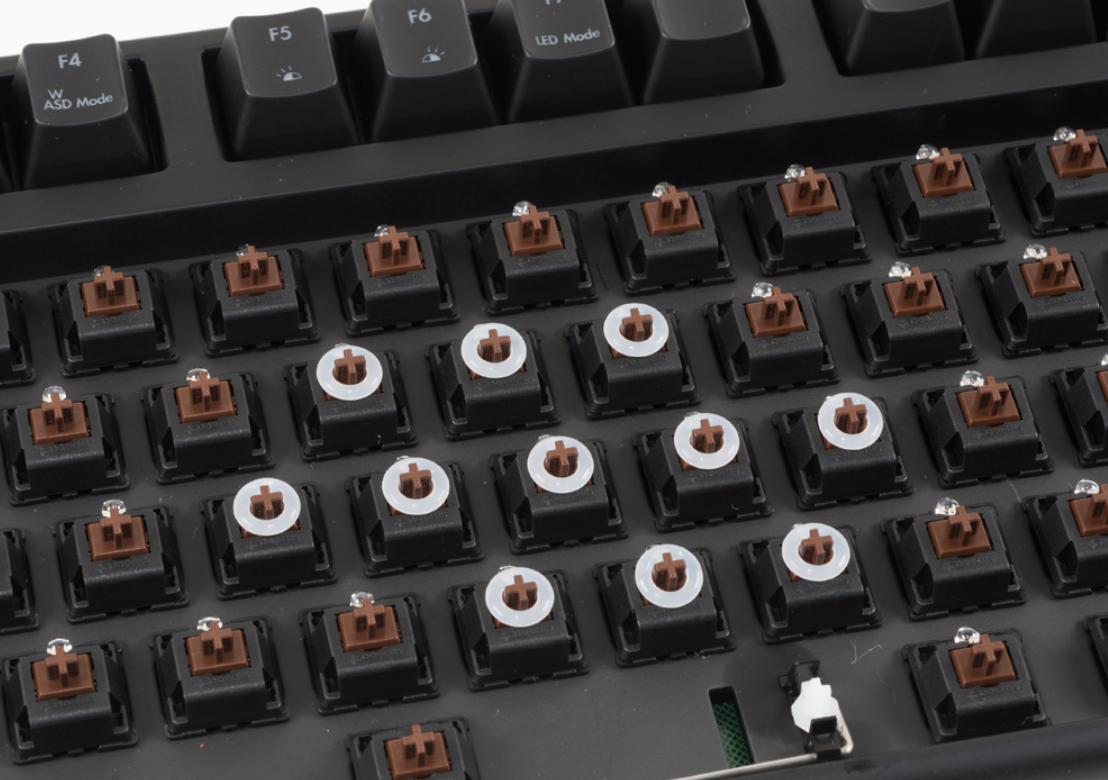
O-rings, tiny silicone rings, can be installed on the keycap stems to reduce the “clack” from key’s bottoming out. O-rings work by preventing the key’s stem hitting the keyboard plate when pressed down, thus eliminating the “click” noise.
Installation is a manual process (here is a more in-depth guide), that requires you to remove all of your keycaps, install the O-rings, then replace all keycaps. A set of O-Ring keyboard switch dampeners will typically set you back anywhere from $5 to $20.
While these will reduce the audible click when the key bottoms out, it doesn’t prevent the noise when the key springs back up.
Optimizing your microphone setup
Setting up your microphone optimally can make a huge impact reducing noise. Microphones come in many shapes and sizes, and we’ve outline tips based on which type it is below.
Desktop / Studio
Positioning
Positioning
Every microphone has a property known as directionality. This indicates from which direction and angle the microphone best picks up sound. Some microphones even include controls on them that let you change the directionality.
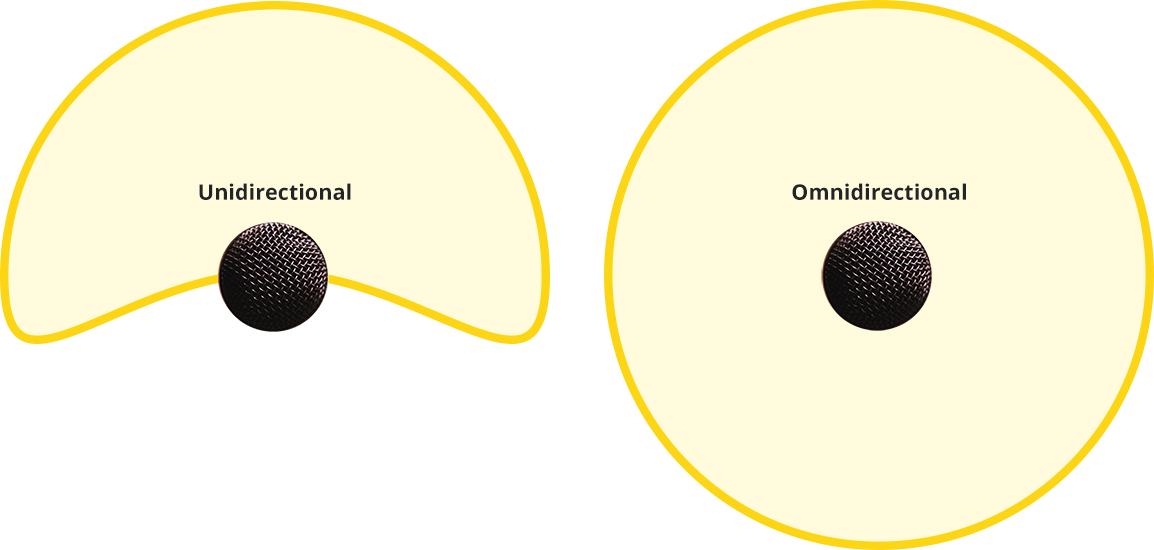
If your microphone is unidirectional or cardioid (picks up sound more from one direction) positioning can help.
You want to position the microphone so that it faces towards you, while your keyboard and mouse are behind it.
See the image to the right for an example of this in practice.
See the image to the below for an example of this in practice.

This will maximize the volume from your voice, and minimize typing noises.
Not sure what your microphone’s directionality is? Try googling the name of the microphone with the keyword “directionality”. Most manufacturers will disclose that information.
Headset
Positioning
Headset microphones by virtue of being closer to your mouth, typically pick up less keyboard noise. If you are buying a new microphone, and it's the main purpose is voice chat while gaming, consider picking up a headset.
One downside is, that they can be more susceptible to breathing and plosives noises. To prevent this, ensure the headset’s microphone is positioned just past the corner of your mouth. Not in front of your mouth or nose.
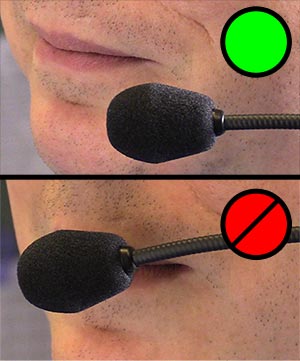
The microphone will still be able to hear you clearly, but avoid any plosive distortion from breathing.
Software
Discord
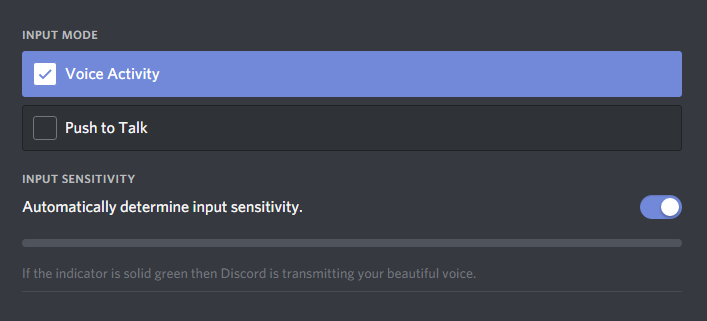
Balance the input sensitivity
By default, Discord tries to automatically determine the sound input level needed to activate your microphone. Most of the time, this works great, but with a loud keyboard in the mix, manual tuning can do a better job.
In Discord's Settings:
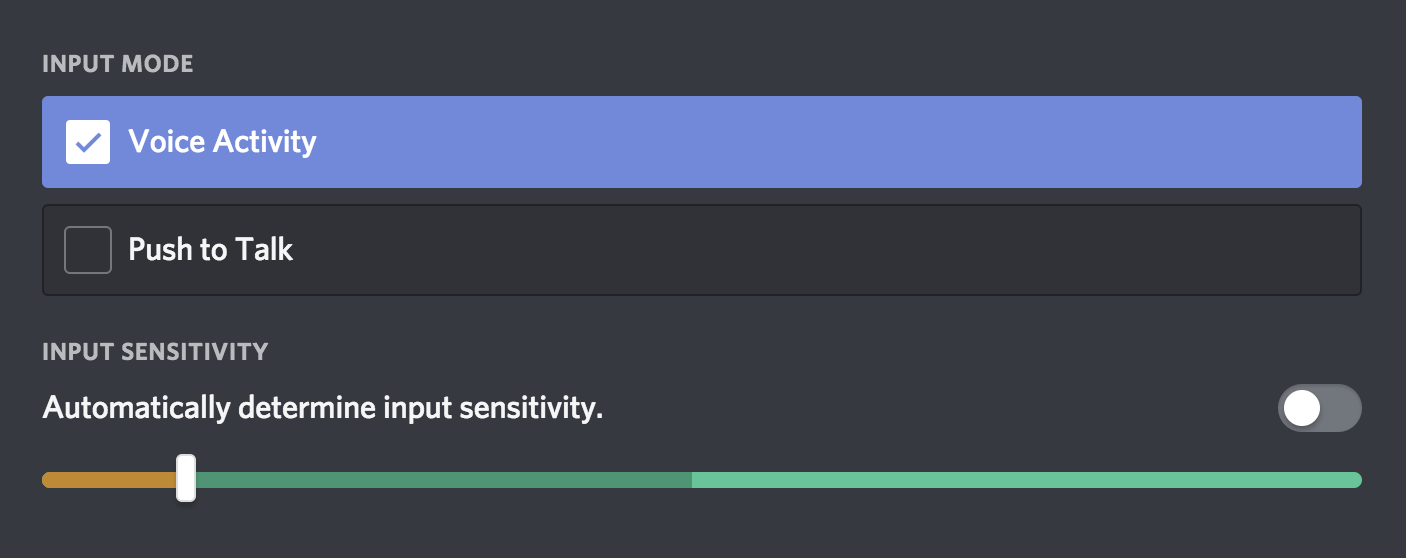
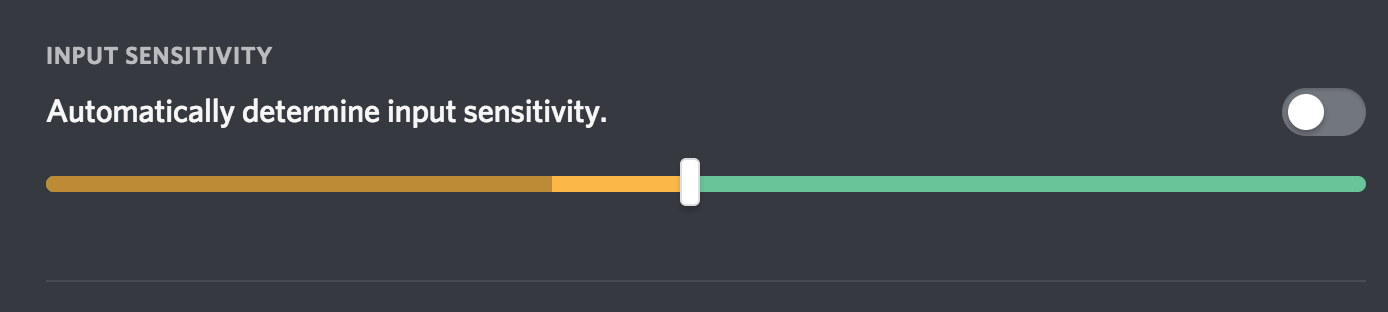
- Under “Voice & Video”, turn off “Automatically determine input sensitivity”
- Tweak the "Input Sensitivity" slider below, and through trial and error, try and find a setting that triggers when you talk, but not when you type.
Getting a perfect balance can be tricky, and if you are struggling try the suggestions below instead.
Use Push To Talk
"Push To Talk" works by un-muting your microphone when a hot-key is pressed down. When you “push” a button, you “talk” and thus prevent any unwanted noises automatically coming through. It can take a little getting used too and requires a bit more cognitive overhead while gaming.
In Discord's Settings:
- Under “Voice & Video” change the Input Mode to “Push To Talk”.
- Click on the "Shortcut" field to edit the Keybind.
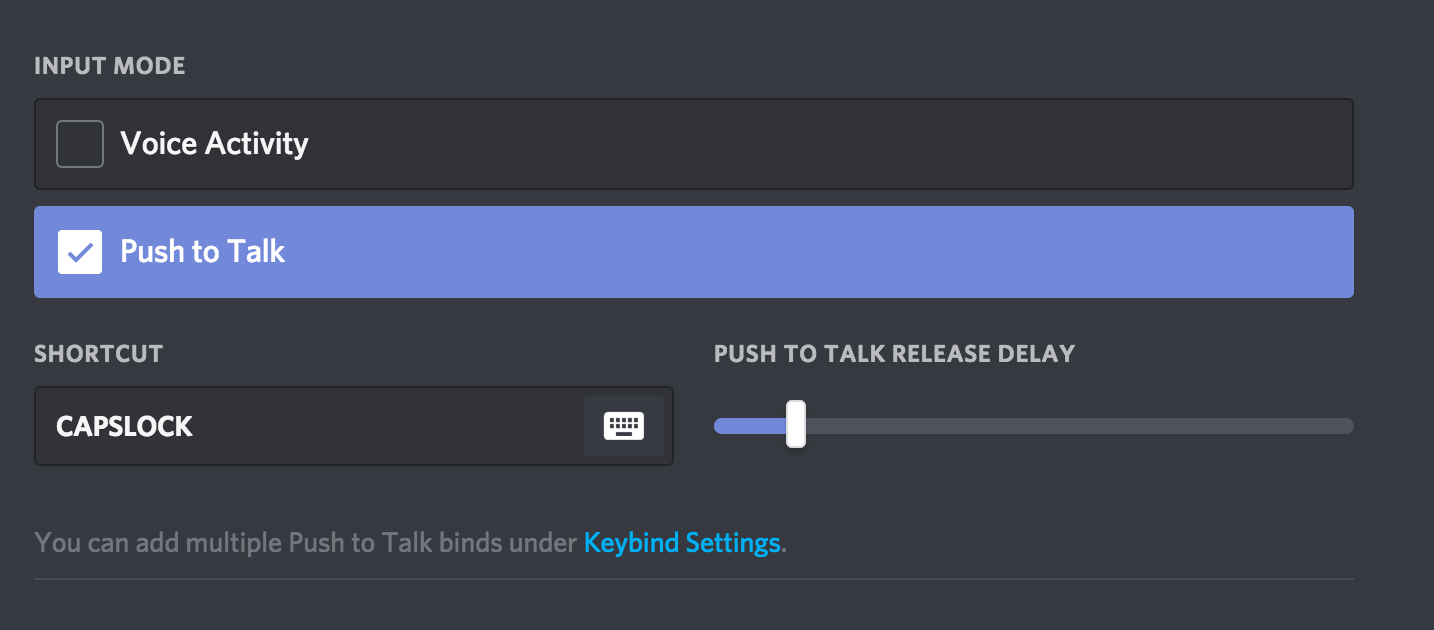

Tip:
Consider using a side buttons on your mouse, or CAPSLOCK as a keybind. They typically are not bound in games and thus won't trigger an action causing a conflict.
Noise Blocker
We built Noise Blocker to help deal with a wide range of unwanted noises without affecting speech quality. Noise Blocker is a powerful, but easy to setup noise gate, that can be quickly customized to prevent incoming keystroke noise being picked up by your microphone.
Download and install Noise Blocker, then follow the instructions below.
Note: If you prefer, you can watch a video of how to stop keyboard noise in Noise Blocker in under a minute.
Open Noise Blocker
- Under the “Noises” list, click on “Add”.
- Hit “Record”, to record a sample of the noise. Hit “Play” to listen back and confirm the recording.
If happy with it, label it then hit “Save” (or hit “Record” to re-record).
Repeat and record as many samples as needed for the offending noises (for example one each for static, fan noise, keyboard or mouse clicks). - Adjust the “Noise Reduction” and “Threshold” settings gradually so that your voice still comes through,
but the offending noises are blocked.
Tip: Using "Listen to this Device" for audio feedback.
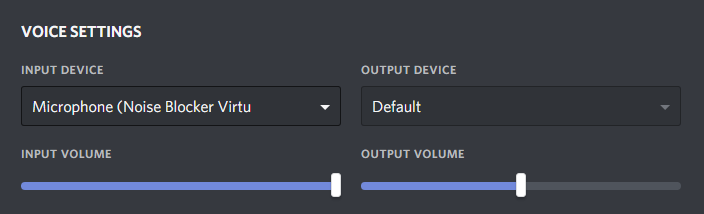
In Discord, we need to switch to use Noise Blocker's virtual microphone.
In Discord's Settings:
- Under “Input Device” select “Microphone (Noise Blocker Virt”
- Ensure the Input Mode is “Voice Activity” and “Automatically determine input sensitivity” is enabled.
And that's it!